Blog Tutorial
Simple Blog application
To feel the power of scrawler lets get started by making a simple blog application !
Scrawler houses all the code of your application backend in the App folder and the front end in the Templates folder .
1 . Make a template to display articles
Goto Templates/default/Main/Index.sct and add following code :
{% extends "shell.sct" %}
{% block body %}

{% for article in articles %}
<div class='well'>
<h1>{{article.title}}</h1>
<p>{{article.content}}</p>
</div>
{% endfor %}

{% endblock %}
Scrawler uses twig as templating engine
You can learn more about developing templates in twig at Twig Homepage
2. Make article model
Now we have are view ready we need our Article model to store information about our articles.
Scrawler support models so that we can work our code with different database and we don't have to stick strictly to MySQL .
Goto App/Models/Article and add following code :
<?php

namespace App\Models;

class Article extends \Model
{
    protected static $table = 'articles'; //name of table to use for this model

/**
* function to return fields of table
*/
    public static function fields()
    {
        return [
            'id'                => ['type' => 'integer', 'primary' => true, 'autoincrement' => true],
            'title'             => ['type' => 'string', 'required' => true],
            'content'           => ['type' => 'text', 'required' => true],
        ];
    }
}
Run Migrate
After making model run
php scribble migrateto populate your database with tables!
3. Pass your articles to your view in controller
Its time to get all entities from user module and pass it to our view and we finally set our rendered homepage as response.
Goto App/Controllers/Main.php and add following code :
<?php


namespace App\Controller;

use App;

class Main
{
    public function allIndex()
    {
        //Get all articles
        $articles = App()->db()->article->all();

        //Render homepage as response , send articles as a data
        App()->t()->render('Main/Index',['articles'=>$articles]);

    }
}
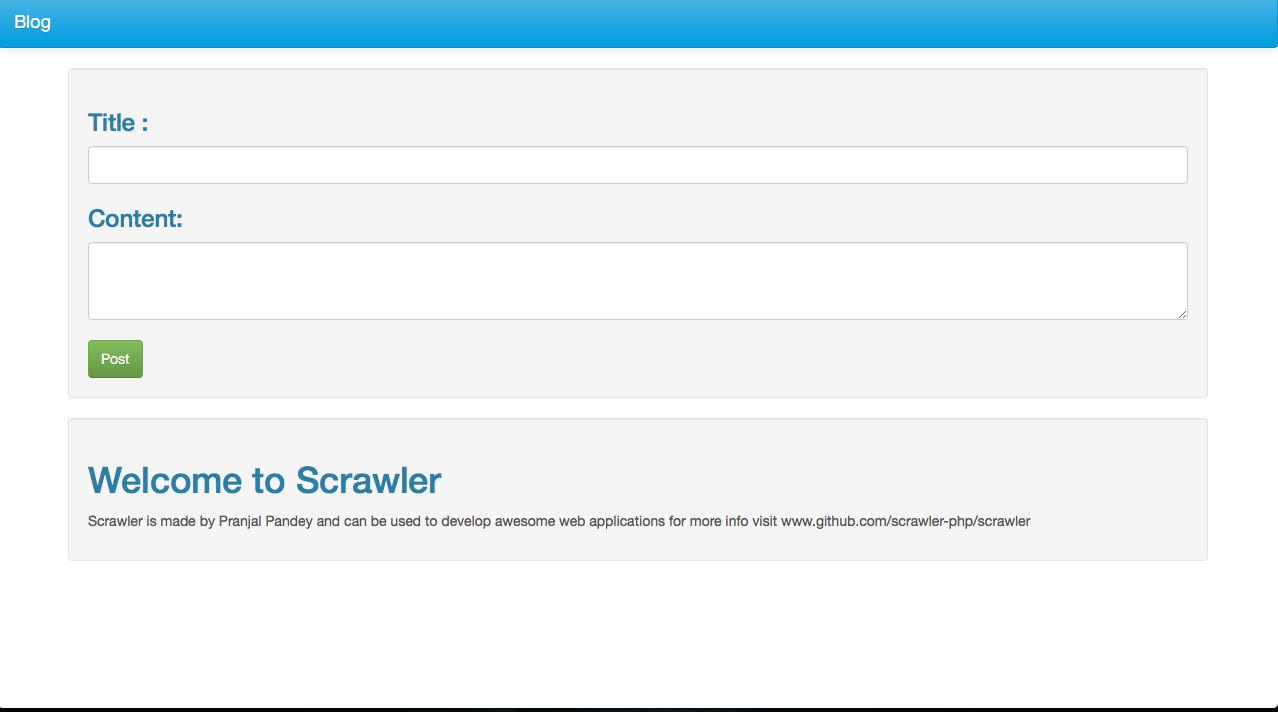
4. Add a form to your view so that we can make new blog posts
We have displayed all the article but there is no way we can add article so lets het back to our template and make a form to add article.
{% extends "shell.sct" %}
{% block body %}

<form action = "{{url()}}/new" method="post">
<div class="well">
<h3>Title :</h3><input type="text" name="title" class="form-control" >
<h3>Content:</h3><textarea name="content" class="form-control" rows="3"></textarea>
<br>
<button type="submit" class="btn btn-success "> Post </button>
</div>
<form>


{% for article in articles %}
<div class='well'>
<h1>{{article.title}}</h1>
<p>{{article.content}}</p>
</div>
{% endfor %}

{% endblock %}
5. Save your articles sent via form in your database via your controller
Goto App/Controllers/Main.php and add following code :
<?php

namespace App\Controller;

use App;

class Main
{
    public function allIndex()
    {

        //Get all articles
        $articles = App()->db()->Article->all()->toArray();

        //Render homepage and set it as response, send articles as a data
         App()->t()->render('Main/Index',['articles'=>$articles]);

    }

       public function postNew()
    {
        //get data sent by form
        $input=App()->http()->allposts();

        //insert data into database
        $result=App()->db()->article->insert($input);

       if($result)
       {
        //diplay success message
         App()->session()->setSuccess('Article successfully added');
       }
       else
       {
        //display error message
        App()->session()->setDanger('There was a problem');
       }

        //redirect to main page
        App()->http()->redirect('');

    }
}
6. Run your app
Open your browser and goto localhost and enjoy your first simple blog

The code for this tutorial can be found at Github
Updated less than a minute ago
